
If your house was built in the 80’s- mid 90’s, your chances of being stuck with some color of hideous laminate countertops are pretty good. Here were mine before the redo-
 Yikes! Yes they really were that dingy vanilla and my cabinets were black. It was a horrible combo- something had to be done, and for cheap! Although I’d lusted after white granite and Quartz countertops for ages, I really can’t justify paying $60 per sq ft…. For anything.
I started thinking about possible solutions for covering up the ugly, and after numerous idea- inspiring trips to the craft store came up with a faux granite paint finish. Now, here’s the deal- if you search on the interwebs for a faux granite paint finish you will find a few different all in one kits, that will promise to give you a beautiful, flawless granite- like finish. Don’t buy them! They probably do work, but the solution I’m going to share with you costs about half of what they do and is 100% customizable. Don’t waste your money. Period.
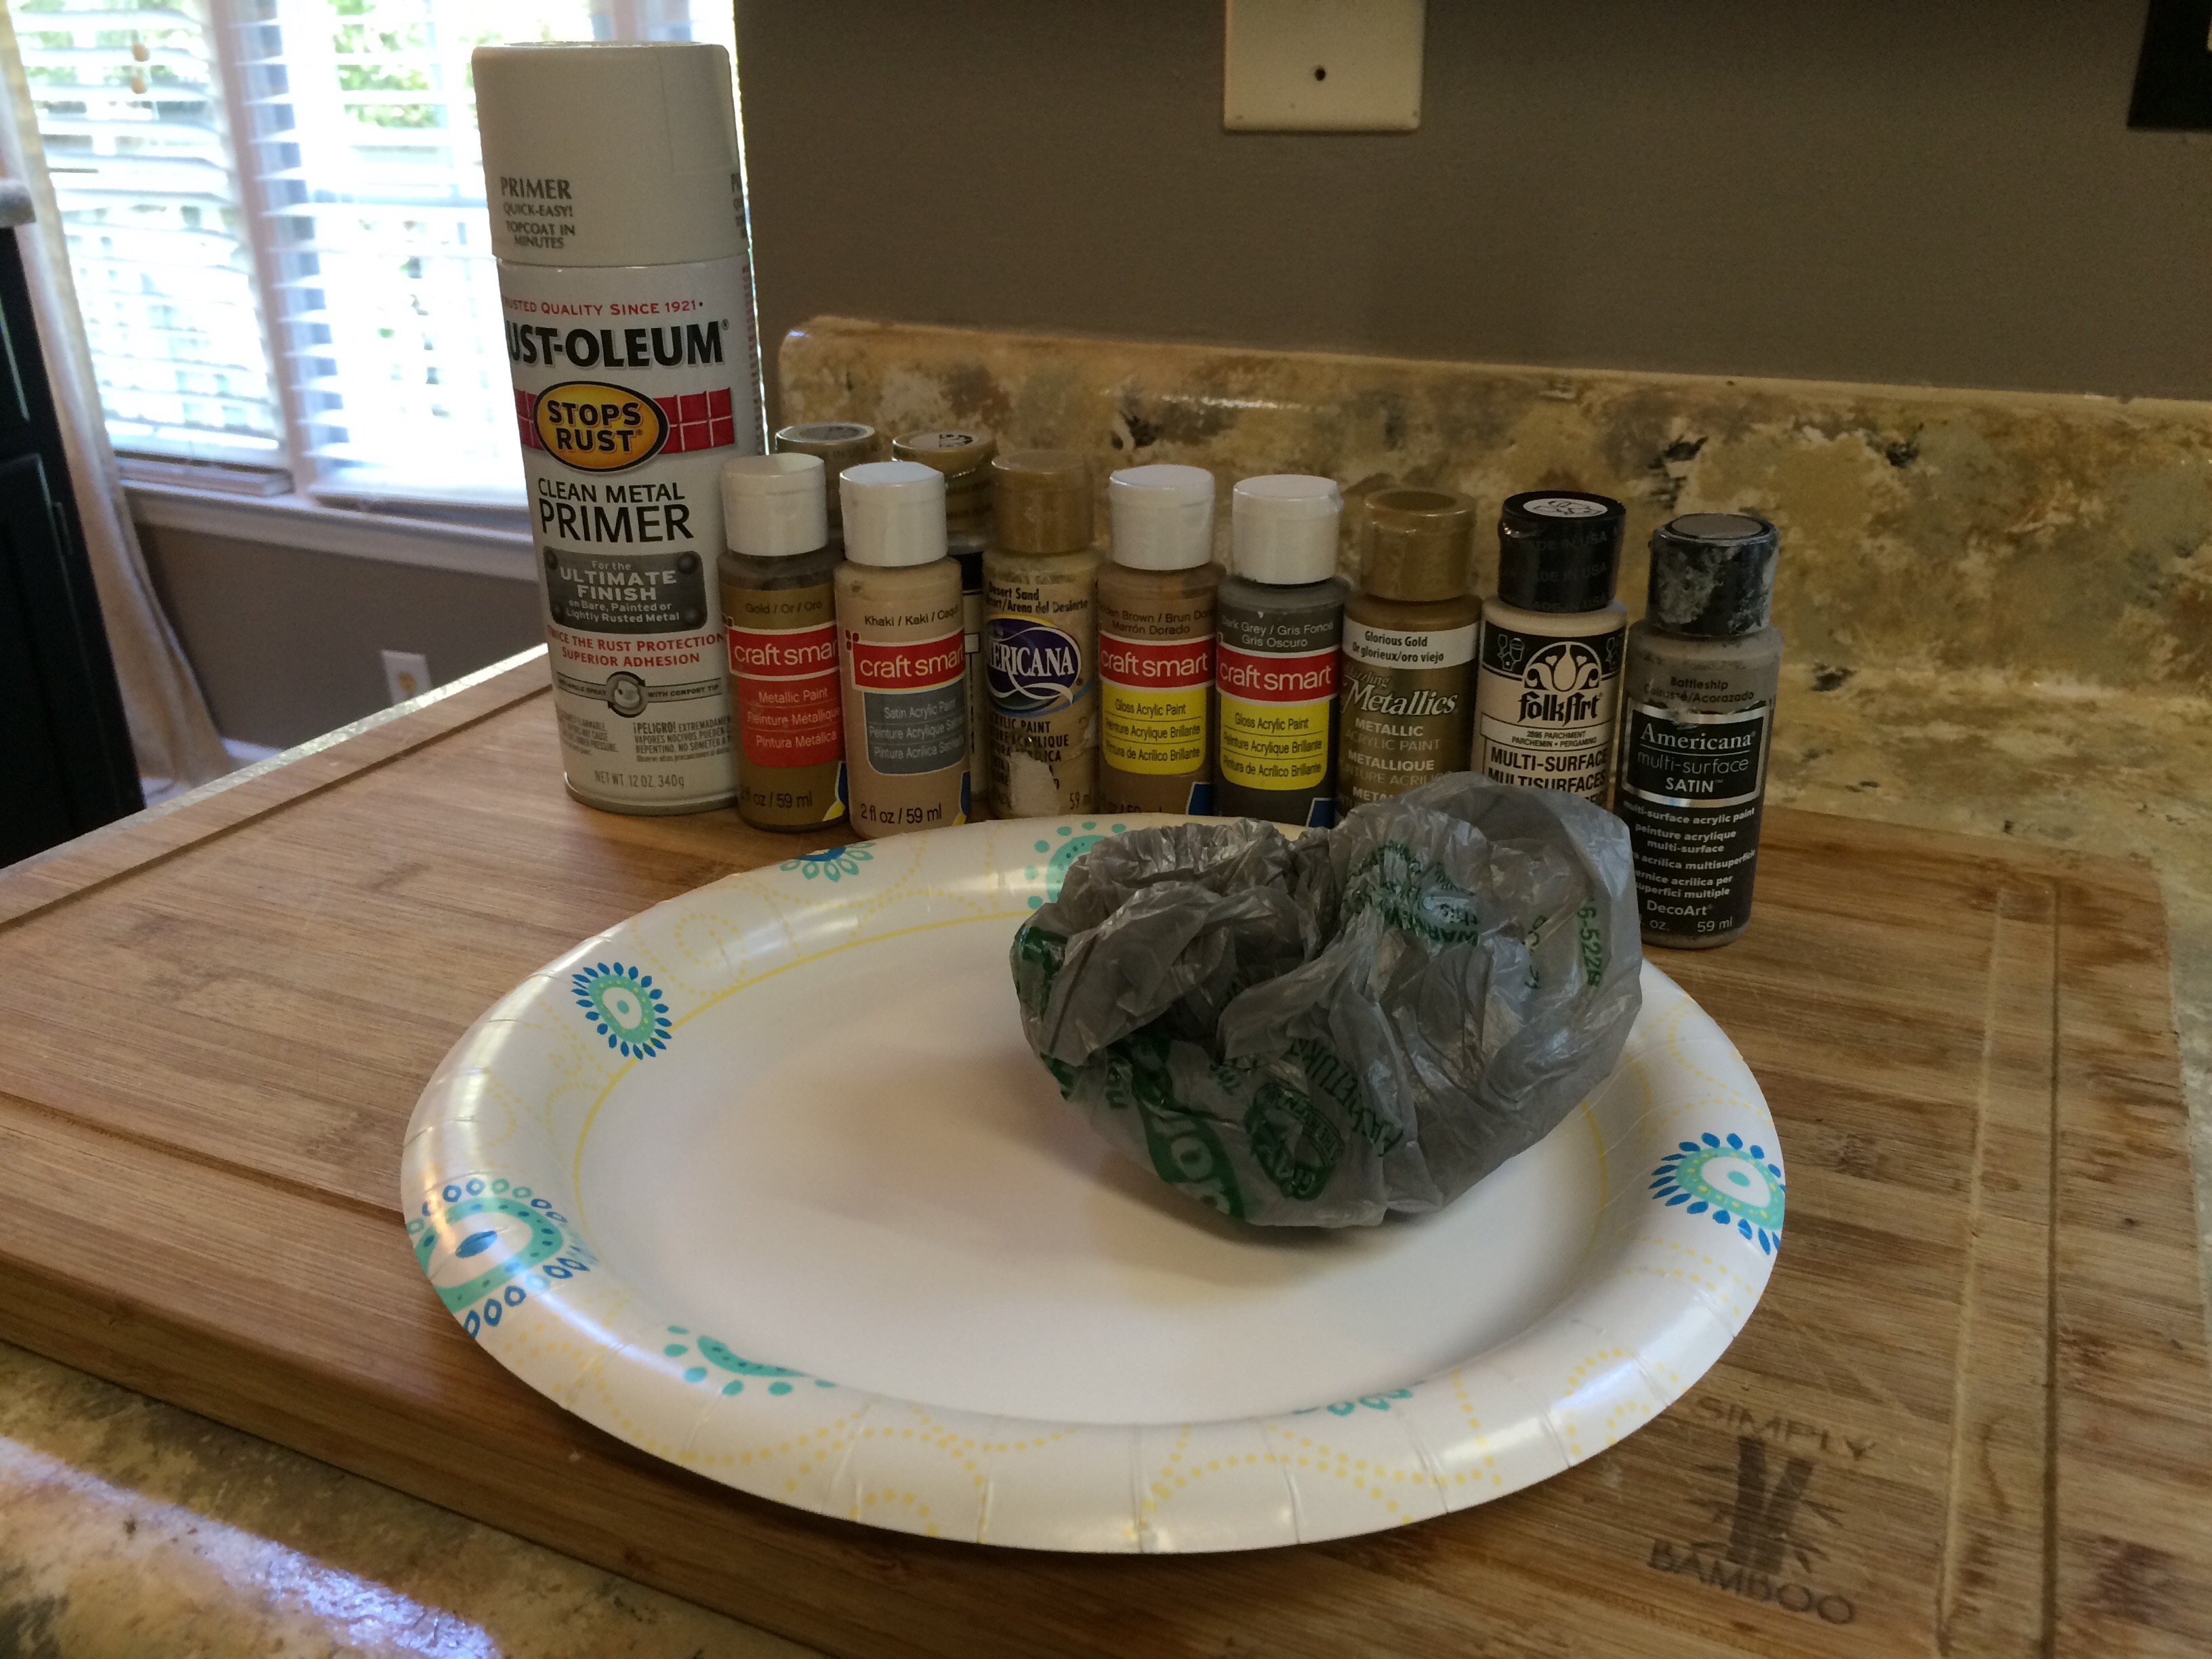
Alrighty, so here’s what you need:
- Plastic baggies- like the kind you throw away or recycle from Target or the grocery store
- Natural sponges- 3 or 4, depending upon the look you want. They need to be natural sponges so you get all of those neat nooks and crannies.
- Disposable paper plates
- White latex Primer, spray or regular. I happened to have a Rustoleum spray primer but you can use whatever you have
- Blue painters tape
- Small container of gloss polyacrylic. I used Minwax that comes in the blue can. Stay away from polyurethane it will turn your counters yellow!
- Paintbrush
- Acrylic craft paint in a variety of colors. These are the cheap small bottles of paint that you can buy in any craft store and some discount retailers. I suggest getting a good mix of greys and beiges, along with black and either silver or gold.

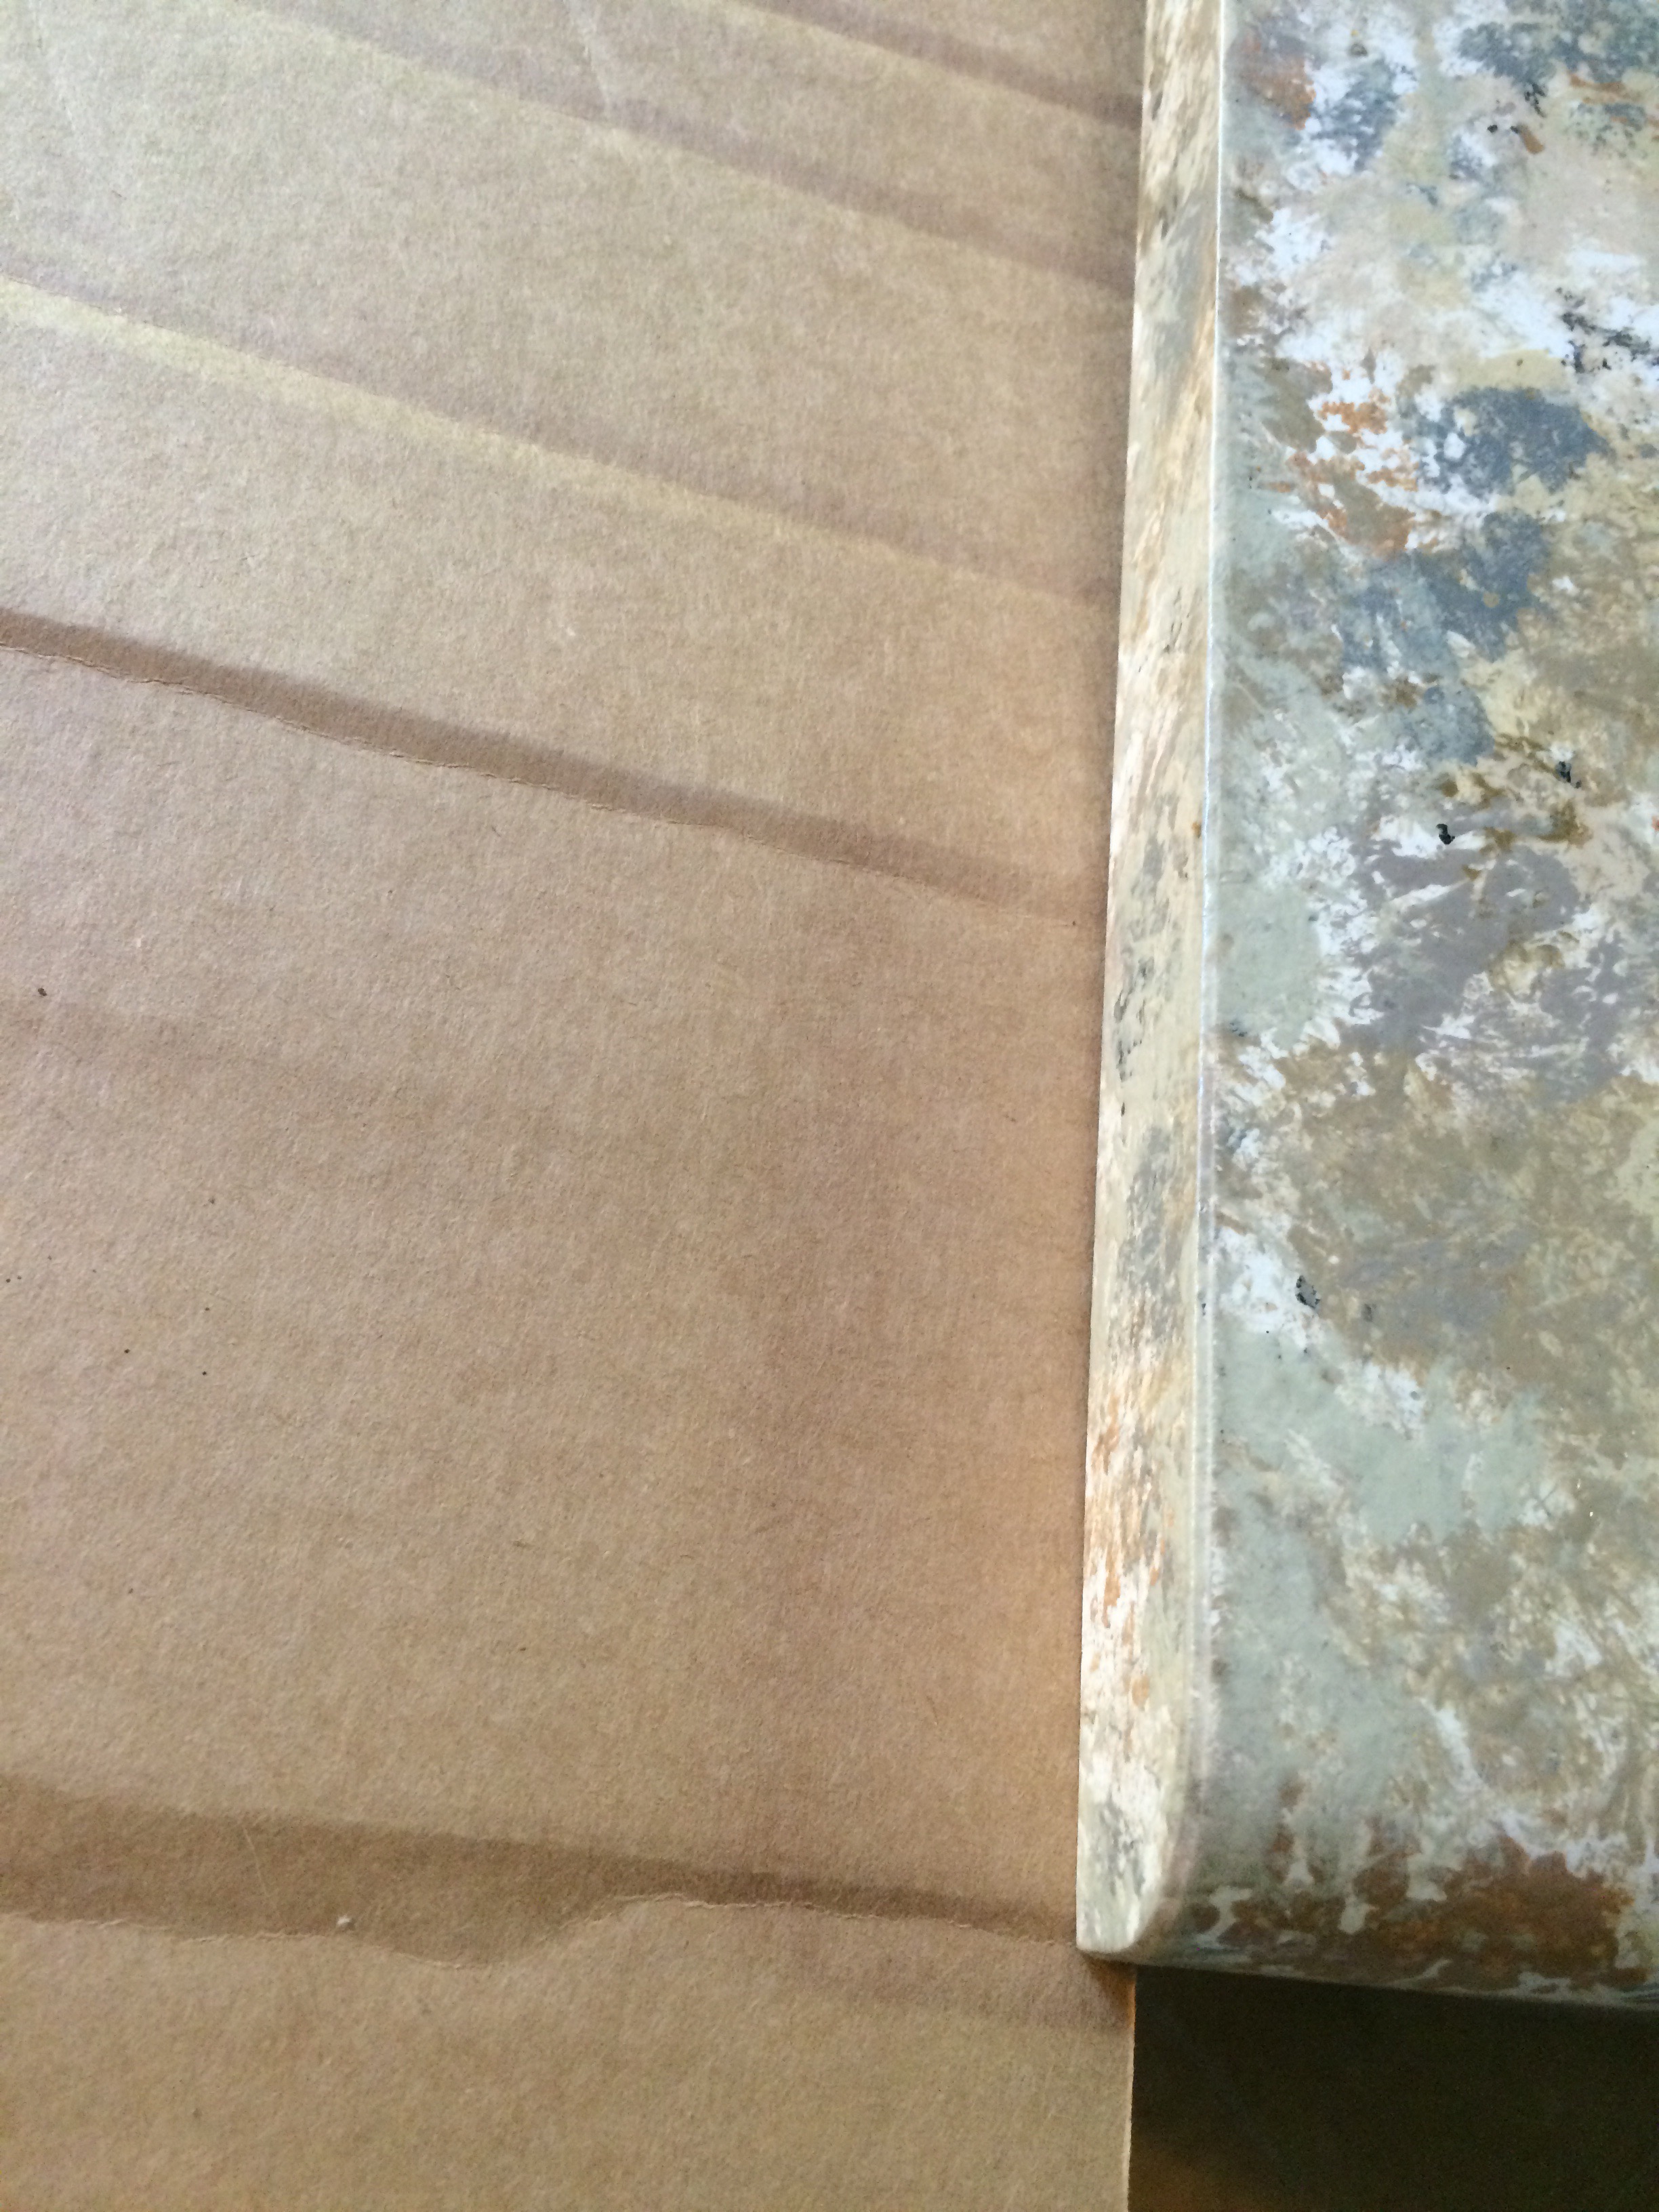
The first thing you need to do before you prime or paint is tape off anything you don’t want painted with blue painters tape. As you can see in the picture above I taped around my sink, backsplash and window. This is essential, don’t skip this step!
Once you are sufficiently taped up, go ahead and prime. Now if you are using a spray primer as I was you will want to use an old cardboard scrap to catch any overspray, like so:
If you are using a brush to paint on your primer, your taping should be all you need. Allow about an hour for your primer to dry to the touch.
Next, comes the fun part, creating your faux finish! Squirt a manageable amount of whatever you want your primary base color to be on your paper plate. I used Butter Pecan and Khaki by Folk Art. Then, take your sponges and began gently sponging the paint onto the counter in random patterns. Now, this is the point where you might have a panic attack, because it’s not going to look anything like granite, at all. Have faith! As you add more paint and begin to layer the look it will.
Once you have sponged on your base colors, prepare your accent colors on your plates, and grab a few of your plastic baggies. Scrunch up a bag and dip it in your accent color and begin sponging over your base color. Your base color should not be dry yet, which is good because you want the colors to melt together. Keep repeating this process until you have the correct tones that you want and you are happy with your sponge effect. If it looks too dark, add a lighter accent on top. If you think you may have blended too much, grab one of your sponges and go over it with a base color to toughen up the look again. You really can’t have too many layers. Once you are happy with your layering, let it dry for at least 6 hours. It should look like this:
After you have let it dry, it’s time to make it shine! Any respectable stone countertop always has that great smooth luster to it, and even though yours is fake, it should too. 🙂
Grab your polyacrylic and paintbrush and begin your shellacking! If you’ve never used polyacrylic it goes on very smoothly, but it is a very thin substance. I suggest doing about 6-7 coats of poly, allowing about an hour of dry time in between each coat. You want your counters to be well protected, so the more coats you do the better protection you will have. When you’re done it should be nice and shiny like this:

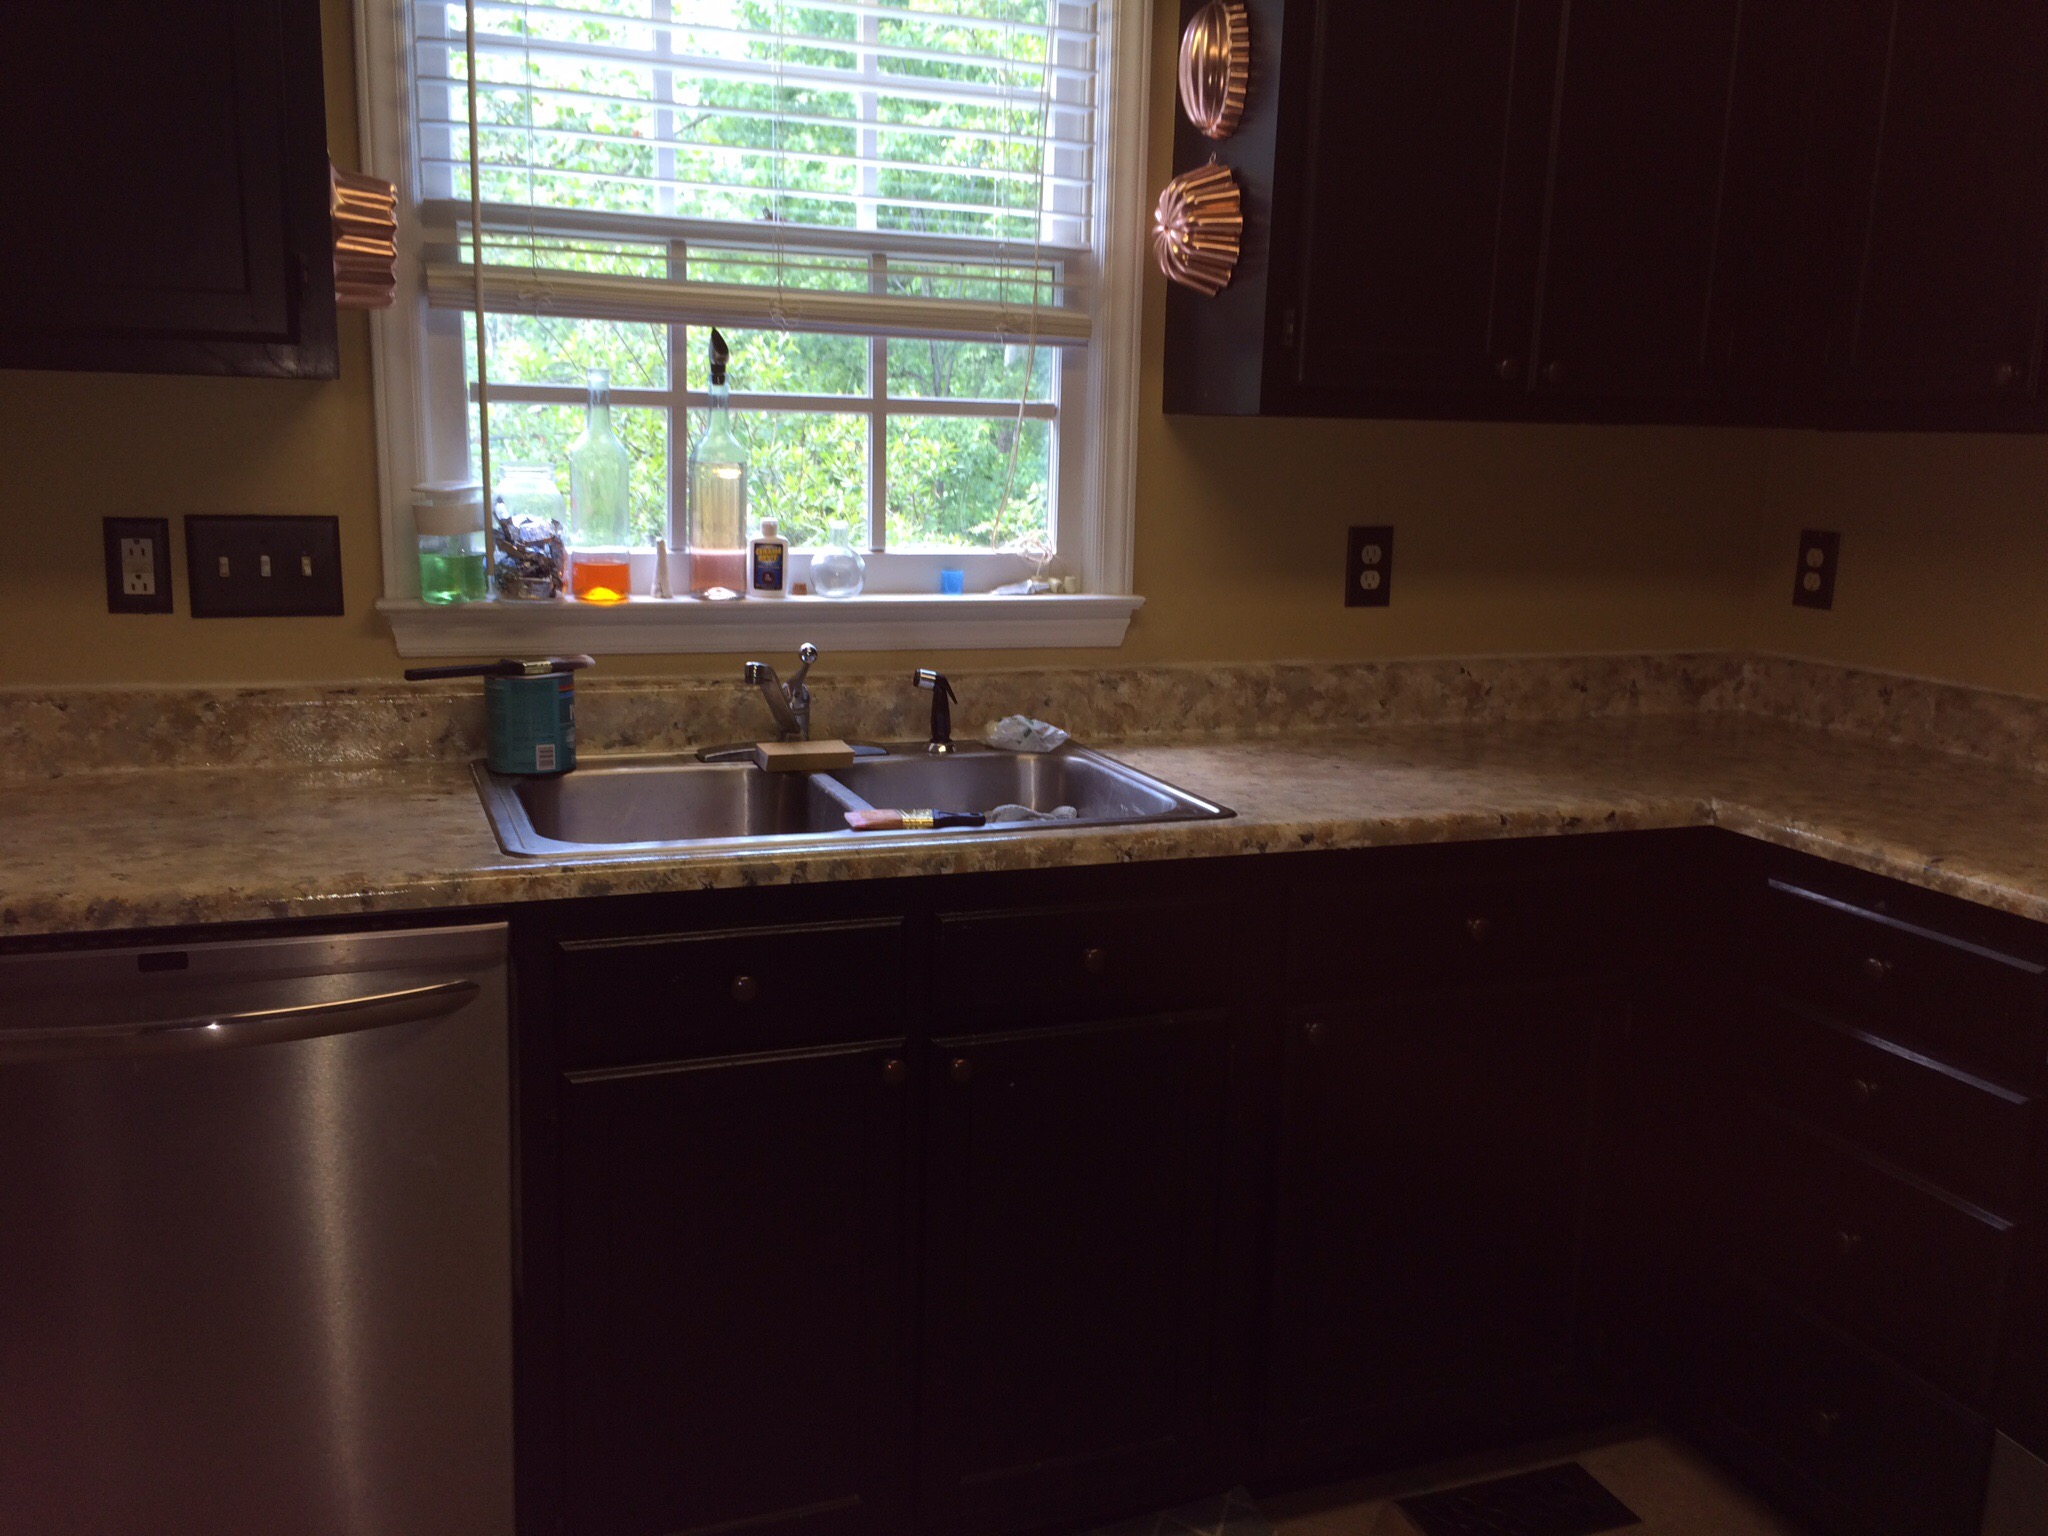
That’s it! Countertops are finished!
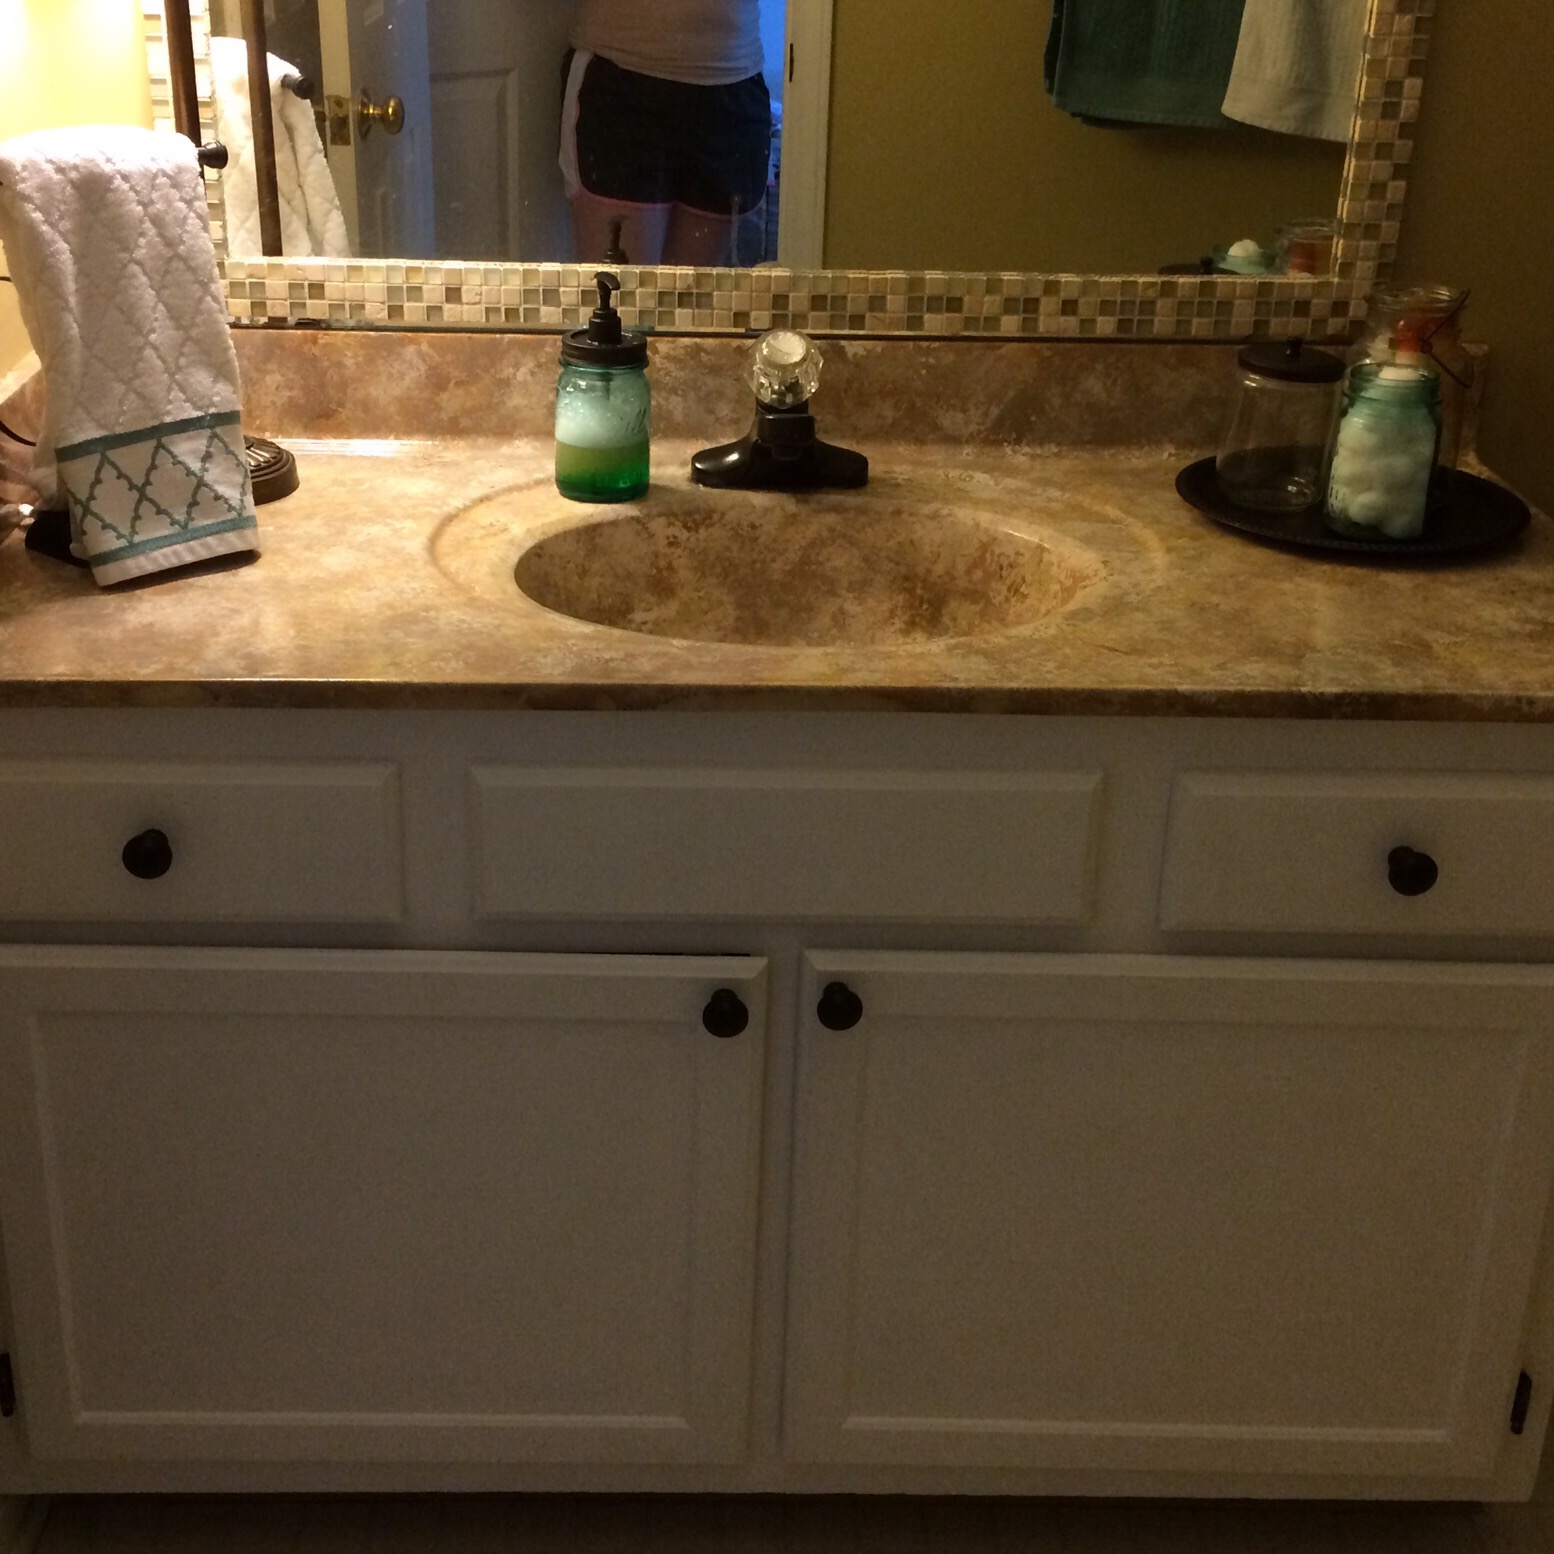
This technique works super well on faux cultured marble surfaces too. After I had such luck in my kitchen with it, I decided to do my upstairs bath as well, and this is how it turned out (sorry for the poor lighting):
For the cost, you really can’t beat this laminate countertop alternative. If I have any Mavens out there that try it and love it, let me know!


Love the counter tops… great idea !!
LikeLike