
When we first moved into our current house, about 7 years ago, i was drawn into the coziness of the cottagey (not a word, but we’re making it one) feel that the smaller rooms and lower ceilings created. The colors were darker than what we had in our townhouse, but warm and neutral, and they all shared a similar color palette. Overall, I thought we had hit a home run with the existing decor. However, over the past several years, I’ve realized how little sunlight every room gets, especially in the Spring and Summer months. Sparse sunlight combined with dark neutral paint colors and standard ceiling heights, had me feeling kind of blah about most of our rooms. None as much as our master bedroom.
While our bedroom does have taller ceilings, the color could only be described as “swamp green”, “swamp brown,” or what i called it, which was just, “swamp”. Imagine the water of the Everglades mixed with mustard yellow, and that’s the color that graced our walls for the past seven years, see below.

I knew that i wanted to do two things to brighten up our master bedroom- repaint, obviously, and then send that builder grade early 90’s – tastic ceiling fan to the landfill. I know this usually goes without saying in my posts, but i did not want to spend a ton of money making over this room. I searched high and low online and in stores for the perfect light fixture, and decided on this one from Amazon:
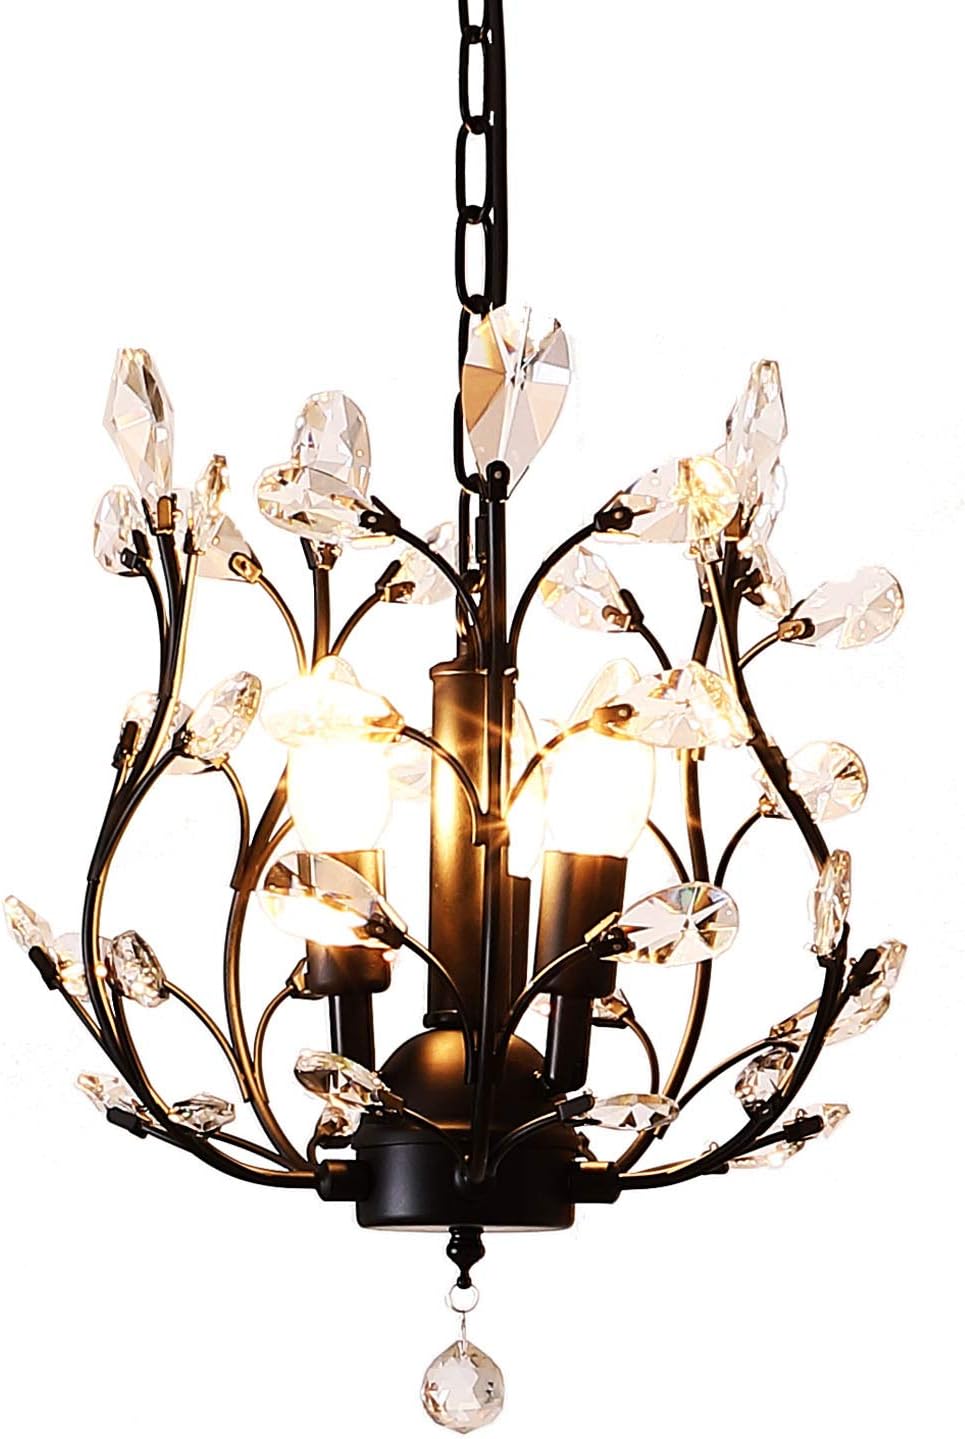
It was on sale, at the time for $70.99, and i think the price has gone up a little since then, but it’s still a good buy. You can check it out here, if you’re interested. I also wanted to add a little pizzaz, beyond a standard chandelier, so i also purchased this ceiling medallion, for $16.99 (way cheaper on Amazon that at Lowe’s and Home Depot.) Now, you all know that when it comes to home improvement projects, i love them, but i do know by DIY limits. Installing a light fixture on a vaulted ceiling is not in my comfort zone, so we hired a handyman who we’ve used for other projects to install this one.
For the paint color, i knew i needed something lighter than what we had, much lighter, but i also didn’t want it to be boring. I’m a huge fan of Sherwin Williams paint, and after sampling 6-7 different options we decided to do an accent wall in a bold hue called Sonoran Teal and the other walls in a light neutral called Celery Root. Life tip, just in case you didn’t know, you can order paint samples online at Lowe’s, and skip waiting at the paint counter, which can come in handy if you are buying more than one. For some reason you can’t buy the actual gallons of paint online to pick up in store, but you can with the samples.
Swamp turned out to be a hard color to paint over. We purchased the middle grade paint option, which was the Sherwin Williams Showcase line, and a heavy duty Kilz primer. We did one gallon of primer, one quart of Sonoran Teal, and 1 gallon of celery root, and we had very little leftover. The painting was truly a labor of love, and as you can see below, i saved those vaulted parts for last, because i was dreading them so much.
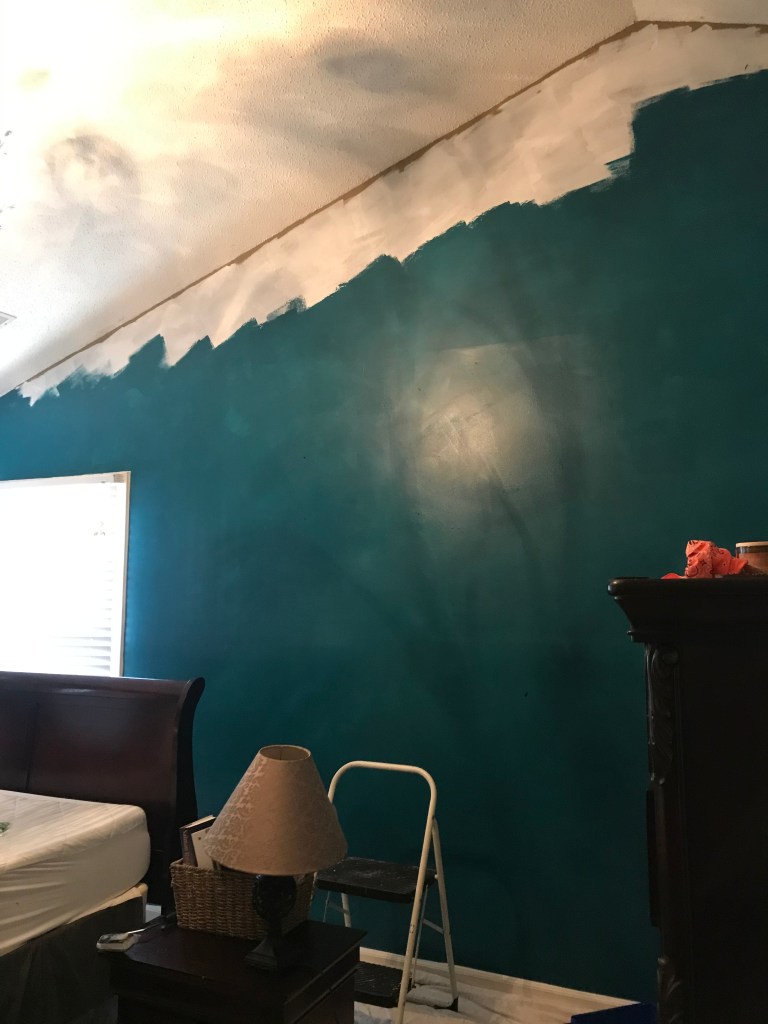
As you can see, Sonoran Teal is….vivid. Trevor walked into the bedroom as i was almost finished and said “i think this paint color should be called AAAhhhh!!!” While it is a lot of color, keep in mind it is contained to that one wall, and having lighter primary walls softens the look quite a bit. Several of you have asked what we used to reach the high spots on the walls, and to be honest with you- nothing fancy. We used a step ladder, and an inexpensive, plain- jane, wooden extender pole from Wal-Mart. We just attached that to our roller, and then to our Shur-line edger, and it did all the hard work for us.

As you can see, the finished product turned out very well. Don’t you just love that painting above the bed? It’s from the Opalhouse line at Target and I had been looking at it for a while, even before we repainted, so i decided to go for it last weekend. It’s so gorg. Also from the Opalhouse collection, is this adorable accent chair, which is just to the left of the windows, i just didn’t get it in the picture. I actually had a serendipitous moment when searching on Facebook Marketplace and found mine, unused, at half price.

I seriously love everything about Opalhouse from Target. The fabrics, colors, and textures are just all so me. If you live under a rock, and haven’t been to Target in the past three years and checked it out- go now. You won’t regret it.
So anyway, there is our bedroom makeover, which completely changed the look of the room, and cost less than $400, including my new painting, and labor for the light fixture install.
I’d love to hear from any of you that have been inspired by this post to do your own accent wall or mini-makeover to a room. Leave me a comment below!
If you liked this post take a look at my other tutorials and DIY shenanigans.


Gorgeous color! The MBR looks fantastic.
I’m inspired!!!
LikeLike